Showing posts with label home. Show all posts

Sunday, October 30, 2016

Home automation update

,

Last year I wrote about my first entry into the field of home automation and the Internet of Things. My first purchase was a combined motion sensor, video camera and Z-Wave hub that can control switches or lights remotely. The device, called Piper, also has sensors for temperature, light, and sound and contains a security siren. I then added some Belkin Wemo LED lights, that required a separate controller and then some OSRAM Lightify LED bulbs and light strips that required their own controller. Ok so now things were getting rather complex with three separate controllers controlling different things. This really reflects the state of the home automation market with many competing standards fighting for dominance; such as: Z-Wave, ZigBee, Hue, Wemo, and even Google and Apple now entering the fray.
   I then came across something called Smartthings that can talk to most of the different automation standards allowing a single controller to automate a wide variety of devices. Of particular interest to me also was that it supports open-source code allowing developers to make their own "SmartApps" for their own needs. which then they can share with the Smartthings community. For example, somebody might make a SmartApp to always ensure that the garage door is closed at sunset. Somebody else might make a SmartApp to turn on the irrigation system at Sunset for one hour, but only if it hasnt rained in the previous day. I now have a Smartthings hub controlling a variety of lights, a motion sensor, garage door opener, and video door bell. My favourite functionality is being told if the garage door is open if Ive left home and being able to remotely close it. The Ring video doorbell that lets me see whos at the front door and talk to them, even when Im not at home, is pretty cool as well.

from The Universal Machine http://universal-machine.blogspot.com/

IFTTT

Put the internet to work for you.

Turn off or edit this Recipe

Read more

Tuesday, September 20, 2016

Mounting the home directory on a different drive on the Raspberry Pi

,

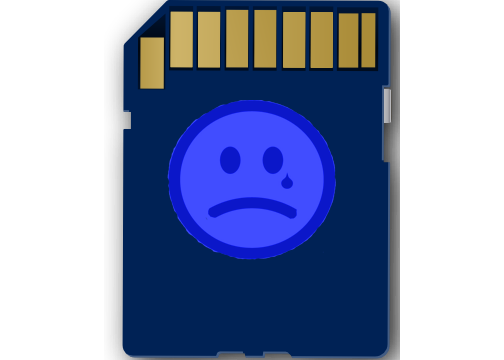
I found myself struggling with SD card corruption this week.
I think it was due to a combination of overclocking and an old SD card. Although I use svn or git with most of my code, occasionally I do a lot of work in a day and forget to add a file. After this last time, I decided to move my home directory to a partition on an external HDD just in case.

I will be posting some file recovery methods later in case you have also lost data.

Start by making sure your external drive is connected and open a terminal.
First of all you need to have root privileges to do all this (or use sudo privileges)
Make sure your drive is not mounted. To unmount it:
umount /mntpoint
If you already have your external drive partitioned, skip to Step 4.

Step 1: Partition External Drive

The fdisk command with the -l flag can list all of your drives and partitions. So start by running that:
fdisk -l
Pick the HDD you want to use (mine was /dev/sdb but Ill put sdx and you can fill in appropriately) and run fdisk again to see partition information
fdisk /dev/sdx
You should be in an interactive prompt. Type p to see the partitions. There should be none. If there arent any, skip to Step 3.

Step 2: Deleting or resizing

If you need the old partitions and want to shrink them, type q to exit the fdisk prompt, otherwise skip to Step  3.
If you are using the partitions and just want to resize them, then there are various commands to do that (also its a good idea to have a back up).
For ext3/ext4, just use: resize2fs /dev/sdx #size
Or use parted
parted /dev/sdx (opens interactive prompt)
resize #size
For ntfs: 
ntfsresize --size #sizeM /dev/sdx
Then open back up the fdisk prompt, you need to make new partitions that match.

Step 3: Writing partition changes

(Open fdisk back open if you closed it)
Now just use d #partition to delete any old partitions.
Then type n to make a new partition followed by p to make it a primary partition. If this is the only partition you need, you can make it the whole disk size. If you shrank a partition, you need to make two new partitions, with the first one having a size that matches your resize options.
Now type w to write changes to disk then q to quit. It will probably give you some warnings, it almost always does. Pay attention to them but dont freak out.
Now format the new partition (If you only made one partition #=1):
mkfs.ext4 /dev/sdx#

Step 4: Copying over your home directory files

Mount your new partition:
sudo mkdir /media/tmp
sudo mount -t ext4 /media/tmp
Navigate to your root folder
cd /home
Copy all your data recursively (this option seems to have worked the best for me to get all of the files including .bashrc and .vimrc files)
sudo cp -rp ./ /media/tmp

Step 5: Mounting your new home directory

Once that is finished, you can move the home directory and mount the new one (make sure no program is currently using the home directory or you will get errors).
sudo umount /media/tmp
sudo rm -rf /media/tmp (get rid of the tmp folder)
sudo mv /home /old_home
sudo mkdir /home
sudo echo "/dev/sdx# /home ext4 defaults,noatime,nodiratime 0 0" >> /etc/fstab
Again replacing x# with your drive number (mine was b2).
Now we can test it by mounting home. If this doesnt work, somewhere you messed up
sudo mount /home
After you have confirmed everything is working and copied over and you dont need your old home directory, you can delete it.
sudo rm -fr /old_home


Now you dont need to worry about SD Corruption.
References for help:
http://joshua14.homelinux.org/blog/?p=660
http://linuxtechres.blogspot.com/2007/08/how-to-use-ntfsresize-from-command-line.html


Consider donating to further my tinkering.


Places you can find me
Read more

Sunday, March 20, 2016

Home automation

,

I like gadgets, it kinda comes with the job. Ive always been fascinated by home automation systems but also recognised that firstly, they were very expensive, and secondly were almost instantly obsolete. Until very recently home automation systems would require lots of complex wiring throughout the house, clunky control panels and bulky remotes and, to be honest, rather like bling but for houses. The fact that any system would become obsolete so fast was a particular problem, since a house is built to last for generations. However, this is changing with the advent of wireless systems and Ive decided to take the plunge. Ill be reporting on what I install and the experience as the system progresses.
   
The first purchase is a Piper from Black Sumac. This is essentially a security camera with extra functionality. Its fish eye video camera can be activated by its built in motion sensor or microphone. Its controlled via an iPhone or Android app and I can watch its live video feed on my iPhone from anywhere. Different security levels can be set depending on whether were just asleep in the front of the house, at work or away on a holiday. Security alerts can be sent to our phones and to a trusted circle of friends who may be asked to check on the property. Piper uses an open source wireless protocol, called Z-Wave, that can control light switches, thermostats, door and window sensors, door locks, and other devices. Rules can be created to trigger various actions; for example, if a door sensor reports that it has been opened, Piper can sound its 120db siren, turn on the lights and start recording video to the cloud. Alternatively, if the rooms temperature falls below a threshold a thermostat can be activated. Piper monitors outdoor and indoor temperatures, humidity, light levels, and ambient sound levels. Piper was easy to install and set up and has operated faultlessly for a couple of weeks without any reboots. It is though very much a work in progress, with some important functionality not available yet, such as downloading video clips from the cloud. It also currently interacts with a very limited range of Z-Wave products. The makers of Piper however say that lots more functionality and interoperability is in the pipeline.

from The Universal Machine http://universal-machine.blogspot.com/

IFTTT

Put the internet to work for you.

via Personal Recipe 895909

Read more

Friday, August 1, 2014

Home computer How to Hewlett Packard C7A42UTABA 4300p Sff I3 3220 500g 4g Win8

,

Learn how to Hewlett Packard C7A42UTABA 4300p Sff I3 3220 500g 4g Win8 on sale

Scores: Hewlett Packard C7A42UTABA 4300p Sff I3 3220 500g 4g Win8

Hewlett Packard C7A42UTABA 4300p Sff I3 3220 500g 4g Win8

Hewlett Packard C7A42UTABA 4300p Sff I3 3220 500g 4g Win8 available

Manufacturer: HP. Each. The HP Compaq Pro 4300 Small Form Factor is a business-reliable PC platform designed to match your everyday needs and deployment functions. Type: Personal computer Form Factor: Small form factor Localization: English / United States Processor: 1 x Intel Core i3 (2nd Gen) 2120 / 3.3 GHz ( Dual-Core ) Cache Memory: 3MB Cache Per Processor: 3MB RAM: 4GB (installed) / 16GB (max) - DDR3 SDRAM - non-ECC - 1333 MHz - PC3-12800 Storage Controller: SATA ( SATA-300 ) Hard Drive: 1 x 500GB - SATA-600 Optical Storage: DVD+-RW (+-R DL) / DVD-RAM Monitor: None. Graphics Controller: Intel HD Graphics 2000 Dynamic Video Memory Technology Audio Output: Integrated - stereo Networking: Gigabit LAN Power: AC 120/230 V ( 50/60 Hz ) OS Provided: Microsoft Windows 8 Pro 64-bit Edition Microsoft Office Preloaded: Includes a pre-loaded image of select Microsoft Office 2010 suites. Purchase an Office 2010 Product Key Card or disc to activate preloaded software on this PC. Dimensions (WxDxH): 13.3 in x 14.9 in x 3.9 in Weight: 16.8 lbs Pricing Type: Promo Environmental Standards: ENERGY STAR Qualified Manufacturer Warranty: 3 years warranty - on-site Customers also search for: Discount Compaq Pro 4300 - Core I3 2120 3.3 GHz, Buy Compaq Pro 4300 - Core I3 2120 3.3 GHz, Wholesale Compaq Pro 4300 - Core I3 2120 3.3 GHz, 0887111713254, C7A42UT#ABA, Desktop Computers

Read more »
Read more
 

Computer Info Copyright © 2016 -- Powered by Blogger